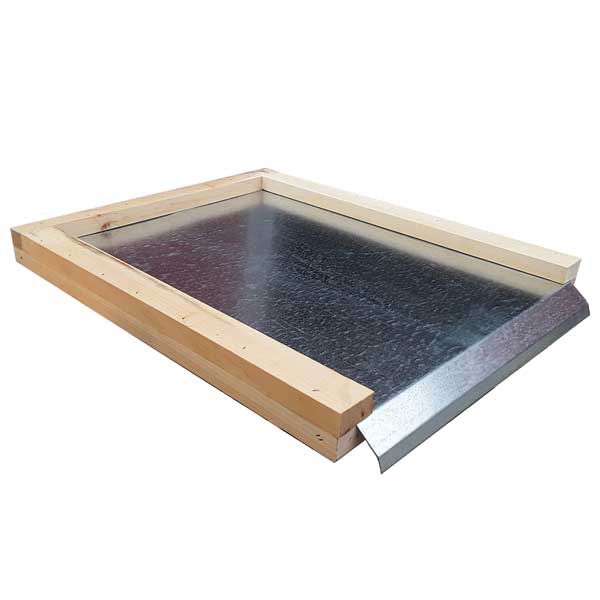
Introducing the Cloake board, the innovative queen-rearing method designed by Harry Cloake of New Zealand. With minimal equipment and disturbance to the hive, beekeepers can easily raise queens. Perfect for newer beekeepers looking to dive into queen rearing with ease.
Cloake boards offer versatile configurations to enhance your beekeeping experience. With a grooved wooden frame, a metal tray, and a queen excluder, this tool provides an additional entrance for your hives. Transform your beekeeping routine with the flexibility and functionality of Cloake boards!
Transform the way you raise bees with the Cloake board system. By using grafted larvae, this system boosts productivity and performance. Say goodbye to inefficient beekeeping methods and hello to a more streamlined and successful process. Elevate your beekeeping game now!
Elevate your beekeeping game with our queen-raising tool! Our product allows you to choose the best colony with two brood boxes, ensuring healthy queens for your hive. Say goodbye to weak queens and hello to thriving, productive colonies. Upgrade now and see the difference for yourself!
1.Select a thriving colony with two brood boxes when preparing to raise queens. This ensures optimal success rates and ensures the production of strong, healthy queens for your beekeeping operation.
2. Separate the two boxes
3. Turn the lower box 180 degrees so the entrance is in the back
4. Close this entrance completely
5. Make sure the queen is in the lower box
6. Make sure some frames of uncapped brood are in the upper box
7. Install the queen excluder and Cloake board without the metal tray, with the entrance facing forward
8. Put the upper brood box above the Cloake board
9. Close up the hive and wait about 12 hours
During this waiting period, the bees (we hope) will accept the larvae you grafted and start building up the queen cells. This is called a “cell builder” colony. These potential queens need to be well fed, so if the colony is lacking honey or nectar, make sure it has syrup and pollen. If there are many frames of uncapped larvae in the upper box you may want to remove these and replace them with plain foundation so the nurse bees will focus all their attention on the queen cells.
10. In just 24 hours, these queen cells will be ready to unite your colonies, forming a powerful, queenright “cell finisher” colony. Say goodbye to weak colonies and hello to a thriving, unified hive. Trust the expertise of our product to enhance your beekeeping experience.
11. Remove the metal slide from the Cloake board
12. Leave the queen excluder in place
13. Block the rear entrance of the bottom brood box
Increase your beekeeping productivity with our revolutionary product. The combined populations of our brood boxes work together to raise grafted queens, providing a seamless and efficient process.
14. The ripe queen cells are removed from the cell finisher
15. Remove the queen cells from the cell finisher once they are capped and place them in individual nuc boxes or queenless splits
16. Remove the Cloake board and queen excluder to fully re-join the original colony
nurses bees no longer need to constantly monitor the cells, saving time and resources. Experience a higher success rate with queen cells hatching approximately 11 days after grafting.
SHawn Olson


